Rapid Friday Sale is Live!
Get exclusive discounts on all products
Thinking about building an app like Uber? The first thing to realize is you're not just building one app. You're actually creating three distinct but interconnected pieces: one for your riders, one for your drivers, and a central command center—the admin panel—to run the whole show.
Your starting point is defining the absolute must-have features for your Minimum Viable Product (MVP). Things like real-time tracking and in-app payments are non-negotiable. From there, you'll pick a solid tech stack, like React Native, and start building the backend logic that makes the magic happen.

Before you even think about code, let's get one thing straight: a great ride-hailing app is more than just a digital taxi meter. It’s a seamless ecosystem built on trust, intuition, and reliability for everyone involved. That ecosystem is built on a foundation of core features that users simply expect today.
The first real step in this journey is to map out those non-negotiable features for your MVP. Think of it as the DNA of your platform. Your goal isn't to build Uber on day one; it's to launch a product that reliably solves the core problem: getting someone from point A to point B.
Why an MVP? Because it gets you to market fast, lets you learn from real users, and stops you from pouring money into features no one actually wants.
A successful ride-hailing platform is really a trio of applications working in perfect harmony. We've built enough of these to know that you need to nail the essentials for all three right from the start.
Here's a breakdown of the must-have features we recommend for any ride-hailing MVP. Getting these right is the key to a successful launch.
| Rider App Features | Driver App Features | Admin Panel Features |
|---|---|---|
| Easy Sign-Up & Profile | Secure Registration & Verification | Centralized Dashboard |
| Real-Time GPS Tracking | Trip Requests & Alerts | Driver & Rider Management |
| Fare Estimation | In-App Navigation | Trip Monitoring & History |
| Multiple Payment Options | Earnings Summary & History | Payment & Commission Tracking |
| Trip History & Ratings | Driver Status (Online/Offline) | Analytics & Reporting |
| In-App Messaging/Calling | Rider Ratings & Feedback | Customer Support Tools |
This table lays out the bare essentials. Anything beyond this list can—and should—wait for a future update based on real user feedback.
A common mistake we see is overcomplicating the MVP. Seriously, focus only on the features that get a ride completed successfully. Fancy extras like split fares or scheduled rides can come later.
Building an app like Uber isn't just a technical puzzle; it's a massive business opportunity. And the market is nowhere near saturated—it's still growing at a blistering pace.
The global ride-hailing market was valued at around $182.4 billion in 2025 and is on track to hit over $442.7 billion by 2032. That’s a compound annual growth rate of 13.5%. E-hailing services are the real engine here, making up nearly 64.5% of all market revenue. Just look at Uber—they operate in 70 countries and handled over 3 billion trips in the first quarter of 2025 alone. You can dig into these numbers yourself over at Meta-Stat Insight's ride-hailing report.
Understanding these figures helps you frame your own ambitions. You don't have to take on Uber globally. Instead, you can carve out a niche by focusing on a specific city, a particular customer segment (like corporate travel), or by offering a unique service. This strategic thinking is what separates the successful launches from the ones that fizzle out.
The tech stack you choose is the literal foundation of your ride-hailing app. It’s going to dictate everything—performance, scalability, and, most importantly, your budget. Getting this right from the start is non-negotiable if you want to build an app that can handle real-world demand without falling over.
This isn’t about picking the shiniest new framework that just hit Hacker News. It’s about being pragmatic and choosing battle-tested tools that play well together. The goal here is a perfect balance: launching your MVP fast while making sure the foundation is solid enough for future growth.
When it comes to the frontend—the part of the app your users actually touch and see—you'll face the classic native vs. cross-platform debate.
Sure, native development (Swift for iOS, Kotlin for Android) gives you the absolute best performance. But it also means building and maintaining two completely separate apps. For a startup, that's basically double the work, double the cost, and double the time. A tough pill to swallow when you're just trying to get an MVP out the door.
This is exactly why React Native is such a game-changer for a ride-hailing app. You write your code once, and it runs beautifully on both iOS and Android. That’s a massive win.
By going cross-platform, you’re not just saving money—you’re buying yourself time and agility. You can test your idea, get that crucial user feedback, and make changes far more quickly than if you were stuck managing two native codebases.
If you want to get a better feel for the landscape, it's worth exploring the different cross-platform app development tools available. Frameworks like React Native and its ecosystem, including tools like Expo, give you everything you need to build a high-quality mobile experience without the native development overhead.
The backend is the brains of the operation. It’s the invisible workhorse handling user sign-ups, managing trip requests, processing payments, and a million other things. It has to be fast, reliable, and built to handle thousands of people using the app at once.
For a real-time app like this, Node.js is a fantastic choice. Its whole design is built around handling many connections at once without getting bogged down, which is exactly what you need when you have drivers and riders all sending and receiving data simultaneously.
For the database, you need something that’s a pro at handling location data. This is where PostgreSQL with the PostGIS extension really shines. PostGIS transforms a standard database into a geospatial powerhouse. It’s what lets you run those critical, complex queries like, "show me every available driver within a 3-mile radius of this user, right now."
And for that real-time magic—like watching the driver's car move on the map—you'll want something like Firebase Realtime Database or WebSockets. These tools create a constant, low-latency link between your server and the apps, which is essential for that slick, live-tracking experience everyone expects from an Uber-like service.
Don't try to build everything yourself. Seriously. The smartest way to launch quickly is to lean on proven, third-party services for key features. Here are the absolute must-haves:
Alright, you've picked your tech stack. Now for the fun part: moving from diagrams and theory to actually building the thing. This is where the core logic of your ride-hailing app takes shape—the real-time dance between data, location, and user input that makes or breaks the entire experience.
Getting this right is what separates a clunky prototype from a service people can actually rely on.
At its heart, the whole system depends on seamless, real-time communication. When a rider opens your app, they don't want to guess where the cars are; they expect to see them moving on the map, right now. When a driver accepts a ride, they need instant, accurate directions. This isn't just a nice-to-have feature. It's the absolute foundation of your platform.
To pull off that smooth, real-time feel, you need a constant, open line of communication between your backend server and the apps on your users' phones. This is a perfect job for WebSockets.
Think of a standard HTTP request like a kid in the back of a car asking, "Are we there yet?" over and over. It's inefficient. WebSockets, on the other hand, open a continuous, two-way channel. Your server can push location updates to the rider's app the very instant a driver's GPS coordinates change. The result? A car icon that glides fluidly across the map, not one that jerks from point to point every few seconds.
To make this work, you'll be handling location data on both ends:
Here’s a simple look at how all the pieces fit together, from the user’s screen to the server’s brain.
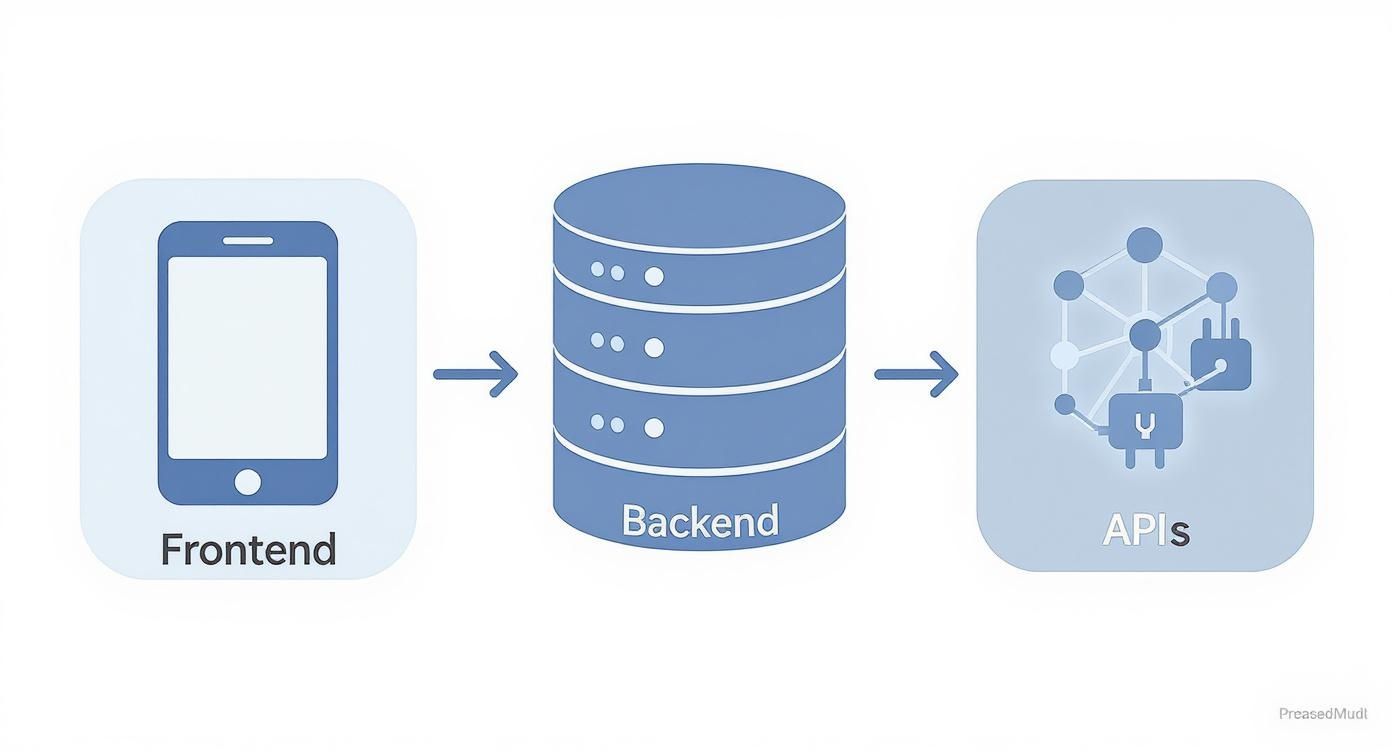
This diagram shows how your frontend app, backend server, and various third-party APIs need to chat with each other to create that seamless experience.
Pulling this off means getting deep into the Google Maps API within your React Native app. For a technical walkthrough, check out our guide on integrating React Native with Google Maps. It’s packed with detailed steps and code snippets.
So, a rider requests a trip. Now your backend has to make a split-second decision: who gets the ride? A simple "closest driver wins" logic is a good start, but it's not enough to build a truly efficient and fair system.
A smarter matching algorithm has to juggle a few variables at once:
My advice: Start simple. Initially, just match based on proximity and availability. As you gather data and get feedback from drivers and riders, you can layer in more complex logic, like factoring in real-time traffic or even driver performance metrics.
This is where your business strategy really comes into play. Market data shows that around 90% of ride-hailing revenue is generated in dense urban areas. In these cities, where long commutes and traffic are the norm, an efficient matching algorithm isn't just a feature—it's essential for your bottom line.
Beyond tracking and matching, you need to map out the entire A-to-Z flow of a trip. This lifecycle is managed by your backend, which has to keep track of several key states and transitions.
Each of these stages requires a rock-solid state management system on your backend to prevent things from going wrong. For instance, a driver who is already on a trip shouldn't be eligible for new requests. Nailing this logic is fundamental to creating a service that just works.
So, when does it make sense to use an app template?
Look, building a ride-hailing app from the ground up is a massive undertaking. The romantic idea of writing every line of code yourself is tempting, I get it. But that path is usually paved with long nights, infuriating bugs, and a budget that seems to evaporate overnight. This is where a pre-built app template comes into the picture as a smart, pragmatic choice.
But let's be real: a template isn't a magic wand. It's a strategic decision. You're making a calculated trade-off between speed, cost, and having absolute, granular control over every single pixel. The question isn't whether templates are good or bad, but when they are the right tool for what you're trying to accomplish.
The single biggest reason to go with a template is speed to market. Seriously. A custom MVP can easily chew up 6-9 months and burn through $70,000 or more before you have anything to show for it. A quality template, on the other hand, can get you launched in just a few weeks for a fraction of that cost.
This isn't just about launching quicker; it's about learning quicker. The sooner your app is in the hands of actual riders and drivers, the sooner you can get the feedback that really counts. A template fast-forwards you to this crucial learning phase while you still have money in the bank to actually act on what you find out.
For most startups, the initial goal isn't to build the perfect app. It’s to prove your business idea works before the funding runs out. A template is often the most capital-efficient way to get that validation.
Think of it this way. Instead of spending your first $50,000 building the same core features every ride-hailing app has, you use a template that gives you those right out of the box. That frees up your budget to pour into what makes your service different—your marketing, your unique driver onboarding process, and the custom features that will set you apart.
Of course, a template isn't always the answer. If your entire business model is built on a truly groundbreaking feature or a specialized algorithm that simply doesn't exist anywhere else, then a custom build is the only way to go.
Here are a few scenarios where building from scratch makes more sense:
Okay, so you've decided a template is the right move. Your work isn't done. The next step is to choose the right one and then customize it strategically. Not all templates are built the same. When you're looking at options, like a taxi booking app template, you need to dig into the details. Look for clean, well-documented code, a modern tech stack (like React Native), and clear setup instructions.
Once you’ve got that solid foundation, the real work begins: infusing it with your brand and unique business logic. This typically involves a few key things:
By starting with a robust template, you get to skip the monotonous work of reinventing the wheel. Instead, you can invest your time and money where it really counts—making your app stand out in a very crowded market.
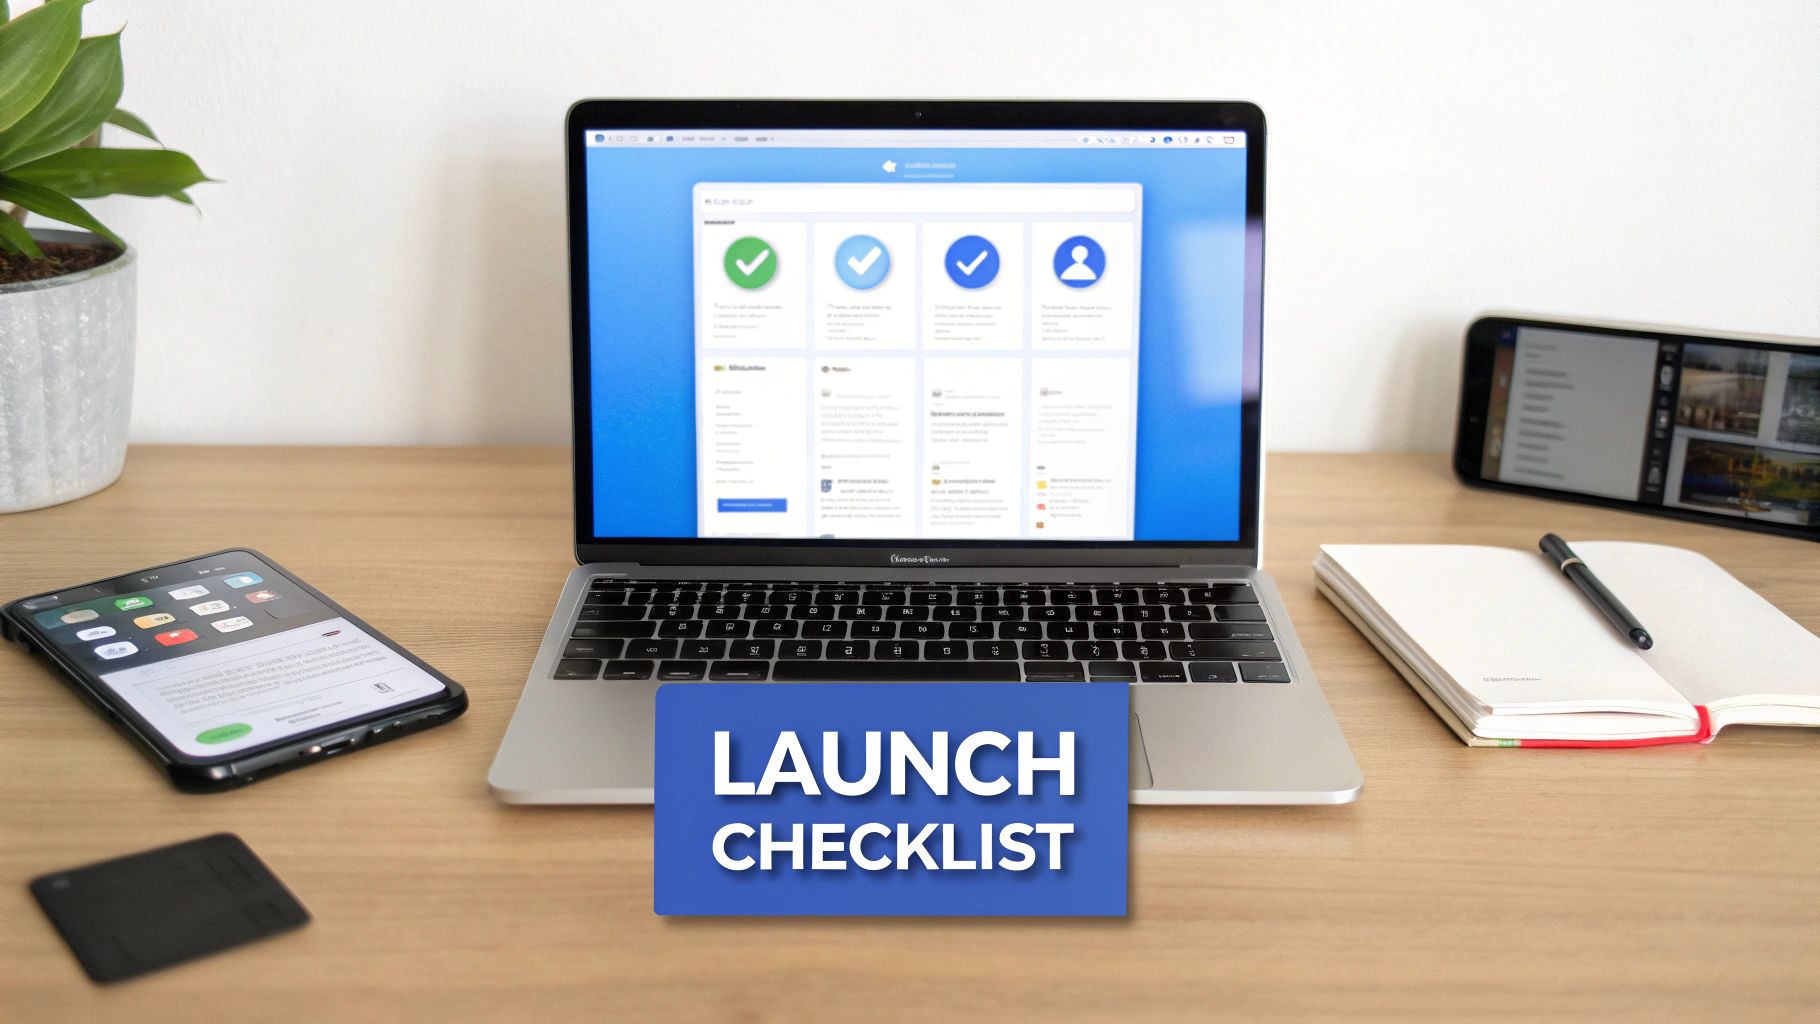
A successful launch isn't about flipping a switch and hoping for the best. It’s a carefully orchestrated process that starts long before your app ever hits the store. These final weeks are all about battle-testing your code, navigating the app store minefields, and having a rock-solid plan to get your first users on board.
Think of it as your final dress rehearsal. This is your chance to iron out the wrinkles and polish the user experience until it shines, making sure every part of your platform—from the rider app to the admin panel—works exactly as it should.
Before a single real user lays eyes on your app, it needs to survive a trial by fire. We're talking about moving beyond basic checks into comprehensive testing that mimics real-world chaos. A buggy app on day one can torpedo your reputation before you even get started.
Your testing strategy needs to be multi-layered:
Your most valuable feedback will come from a closed beta program. Get a small, trusted group of real riders and drivers to use the app in your launch city. Their insights on everything from UI quirks to GPS accuracy are pure gold.
Getting your app approved by Apple and Google isn't a rubber-stamp process. Both platforms have strict, and sometimes quirky, guidelines. A rejection can easily set your launch back by weeks, so knowing the common pitfalls is key to a smooth submission.
For both the App Store and Google Play, pay close attention to:
I always recommend giving yourself at least a two-week buffer for the review process. Apple's review, in particular, is notoriously thorough, so do yourself a favor and read their Human Interface Guidelines carefully.
You’ve built an amazing app—now you have to solve the classic chicken-and-egg problem. You can't attract riders without drivers, and you can't convince drivers to sign up without any riders. Your launch marketing has to tackle both sides of this marketplace at the same time.
The competitive landscape is always shifting, but there are still openings. With passenger cars making up 63.41% of market revenue, new players have room to grow, especially as two-wheelers gain traction in congested cities. You can learn more about the evolving ride-hailing market from Mordor Intelligence.
Start by focusing on a specific neighborhood or district to concentrate your firepower. Your initial plan should be hyper-focused:
To keep everything straight, a simple checklist can be a lifesaver. Here’s a template to get you started.
| Phase | Key Tasks | Status |
|---|---|---|
| Pre-Launch | Finalize UI/UX design and branding assets. | ☐ To Do |
| Conduct closed beta testing with target users. | ☐ In Progress | |
| Set up analytics and crash reporting tools. | ☐ Done | |
| Prepare App Store & Google Play listings (screenshots, descriptions). | ☐ To Do | |
| Develop initial driver onboarding materials and incentives. | ☐ In Progress | |
| Launch Week | Submit final app builds to Apple and Google for review. | ☐ To Do |
| Launch targeted social media and local ad campaigns. | ☐ To Do | |
| Activate driver incentives and rider promotions. | ☐ To Do | |
| Monitor server performance and app stability in real-time. | ☐ In Progress | |
| Post-Launch | Gather and analyze user feedback from reviews and support channels. | ☐ To Do |
| Address critical bugs with a day-one patch if needed. | ☐ To Do | |
| Track key metrics (downloads, ride requests, driver activity). | ☐ To Do | |
| Plan the first feature update based on user data. | ☐ To Do |
This checklist isn't exhaustive, but it covers the critical path to getting your app live and into the hands of your first customers. Stay organized, and you'll be well on your way.
Building an app like Uber is a huge undertaking, and it's natural to have a ton of questions swirling around. Let's tackle some of the most common ones we hear, especially when it comes to the budget, the tech, and getting those first crucial users.
This is the big one, and the honest answer is: it depends. The price tag for an Uber-style app can swing wildly based on how complex you want to get, the features you need, and who you hire to build it. For a bare-bones MVP with just the core ride-hailing features on a single platform (like iOS or Android), you're probably looking at a range of $30,000 to $70,000.
If you're aiming for a more polished, cross-platform app with all the bells and whistles, built by a top-tier agency, that number can easily climb to $80,000 to $250,000 and beyond. What drives that cost up? Things like a sophisticated matching algorithm, multiple third-party integrations (payments, maps, analytics), a totally custom UI/UX, and a powerful admin panel to run the whole show.
A smart shortcut is using a pre-built template. This can get your initial costs down into the $5,000 - $15,000 neighborhood. Just remember, customization and backend setup will be additional costs on top of that initial purchase.
The real win here is speed. This approach lets you hit the market fast, test your idea, and see if it has legs without having to raise a mountain of cash upfront.
From a developer's perspective, there are three major mountains to climb: real-time functionality, scalability, and getting the matching algorithm just right.
First, you've got to nail the real-time GPS tracking. Showing thousands of cars and users moving on a map smoothly and accurately, without draining everyone's batteries, is a serious backend challenge. It requires a solid setup with technologies like WebSockets and a database that can handle a constant storm of updates.
Next up is the driver-rider matching algorithm. This is the secret sauce. It's not just about finding the closest driver; it’s about balancing distance, live traffic, driver ratings, and maybe even surge pricing, all in a split second. A slow or dumb algorithm creates a terrible user experience and an inefficient network.
Finally, your app has to be able to handle rush hour. Think about Friday night or after a big concert lets out. The system needs to scale instantly to manage that spike in demand without crashing. That means thinking about server infrastructure, load balancing, and maybe even a microservices-based architecture from day one.
Let's be crystal clear: handling payments securely is non-negotiable. The best—and frankly, the only sane—way to do this is by integrating a trusted, PCI-compliant payment gateway like Stripe or Braintree. Whatever you do, never try to store raw credit card numbers on your own servers. It's a security nightmare and a massive liability.
Here’s how it works in a nutshell:
This process completely offloads the security and compliance headaches to a company that specializes in it. It keeps you safe, and more importantly, it keeps your users' sensitive data safe.
Ah, the classic "chicken and egg" problem of any two-sided marketplace. You need riders to attract drivers, but you need drivers to attract riders. The trick is to focus on building your supply (drivers) first, then go after demand (riders).
Start by making drivers an offer they can't refuse. Think about things like:
Once you have a solid group of drivers active in a specific, high-density area, it’s time to flip the switch and go after riders. Hit that same neighborhood hard with aggressive promotions. Offer free ride credits to new users and a killer referral program (e.g., give a free ride, get a free ride). You can also run hyper-local digital ad campaigns or even partner with local bars, restaurants, and event venues to get the word out and sign people up.
Ready to stop planning and start building? With theappmarket, you can launch your ride-hailing app in a fraction of the time and cost. Our production-ready React Native templates give you the foundation you need to get your MVP to market fast. Check out our templates and accelerate your launch today!

Dec 08, 2025

4 min read
android login with facebook: Learn to set up the Facebook SDK, manage tokens, and implement secure authentication across native Android, cross-platform apps.

Dec 07, 2025
4 min read
Master the alert in React Native. Learn to handle platform differences, build custom modals, and apply best practices for a seamless user experience.
Dec 06, 2025
4 min read
keyboardavoidingview react native: Master keyboard handling with KeyboardAvoidingView across iOS, Android, Expo, and TypeScript.

Dec 05, 2025
4 min read
A practical guide to implementing a React Native PDF viewer. Learn to compare libraries, handle native setup, and troubleshoot common issues with real code.

Dec 04, 2025
4 min read
how to validate startup idea: learn proven methods like customer interviews, MVPs, and metrics to confirm market fit.

Dec 02, 2025
4 min read
Build a rock-solid React Native setup. This guide covers Expo vs. Bare workflows, TypeScript, pnpm monorepos, NativeWind, and deployment strategies.
Dec 01, 2025
4 min read
A practical guide to Stripe React Native integration. Learn to set up your server, build payment UIs, handle webhooks, and launch secure mobile payments.

Nov 30, 2025
4 min read
Learn how to master push notifications in React Native. This guide covers setup, best practices, and advanced techniques for engaging your users.

Nov 29, 2025
4 min read
Build powerful location-based apps with our practical guide to react native with google maps. Get setup guides, pro tips, and best practices for iOS & Android.

Nov 28, 2025
4 min read
Explore deep linking react native with a practical guide to configuring URL schemes, universal links, navigation, and testing for Expo and bare apps.

Nov 28, 2025
4 min read
A practical guide to building a scalable React Native design system. Learn to implement tokens, theming, and tools like NativeWind and gluestack-ui.

Nov 26, 2025
4 min read
Learn why react native expo templates speed up your projects with ready-made patterns and practical tips.

Nov 25, 2025
4 min read
Discover how to improve developer productivity with actionable strategies for workflow, tooling, and culture. A practical guide for software engineering teams.

Nov 24, 2025
4 min read
Discover the best cross platform app development tools. Compare top frameworks like Flutter and React Native to build and ship apps faster.

Nov 23, 2025
4 min read
This Expo React Native tutorial provides a hands-on guide to building cross-platform apps. Learn setup, styling with NativeWind, navigation, and deployment.
Nov 22, 2025
4 min read
Build beautiful UIs faster with this guide to Tailwind CSS React Native. Learn setup, styling, and advanced techniques with NativeWind for mobile apps.

Nov 21, 2025
4 min read
Explore our curated list of 7 top-tier React Native app examples. Discover production-ready templates and resources to build your next app faster.
Mar 19, 2025
4 min read
theappmarket offers React Native UI templates to accelerate development. Get customizable, production-ready React Native app templates and Ui kit, some free. Build faster & smarter today!
