Rapid Friday Sale is Live!
Get exclusive discounts on all products
Nov 29, 2025

4 min read


Pairing React Native with Google Maps is a game-changer. It lets you build slick, feature-packed mapping apps for both iOS and Android from a single codebase, which is a massive win for saving time and money. The real magic, though, is that you're tapping into Google Maps—an interface billions of people already know and trust. Your app instantly feels familiar.
Look, choosing your tech stack is a big deal. When you decide to build with React Native and Google Maps, you're not just picking tools; you're making a strategic move that delivers on efficiency, performance, and user experience. React Native's whole "learn once, write anywhere" mantra means a huge chunk of your code works on both iOS and Android right out of the box. Combine that with the powerhouse that is the Google Maps Platform, and you've got everything you need for killer location-based apps.

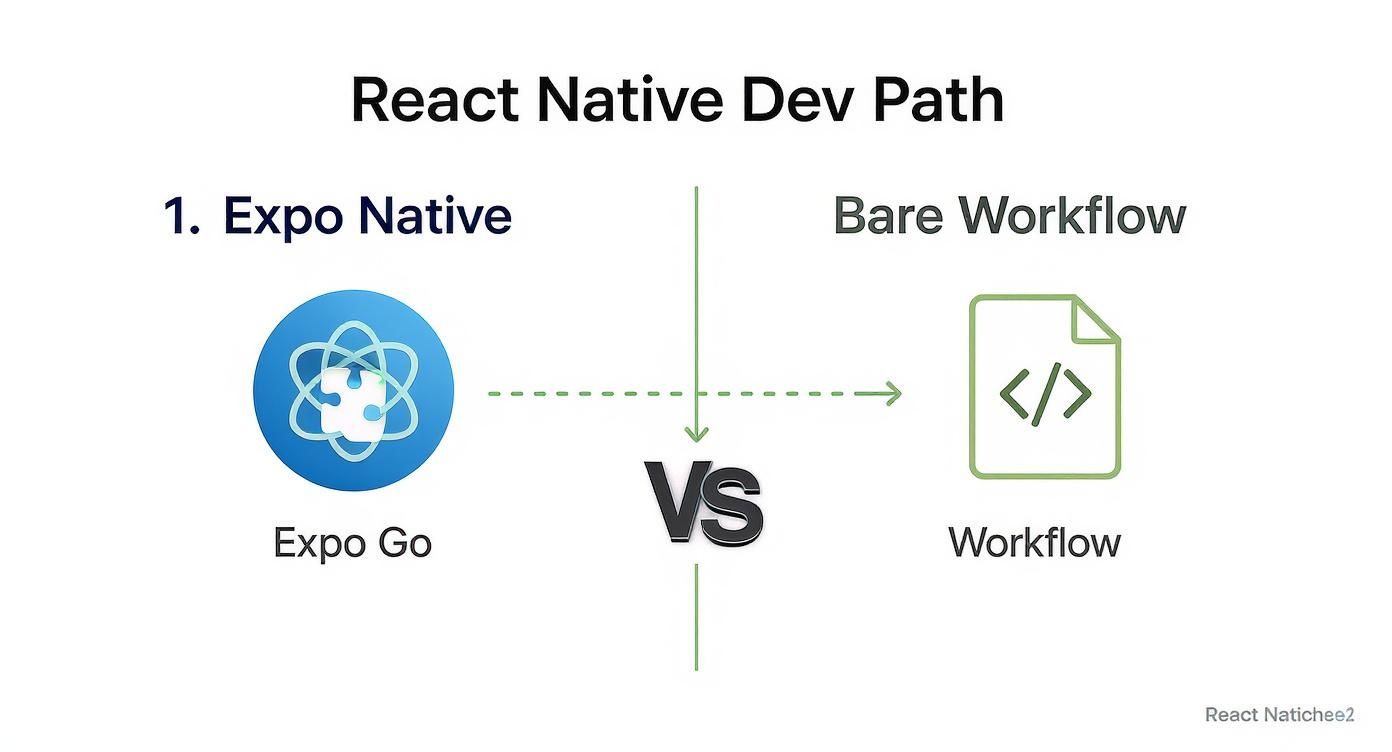
Before diving into the code, it's crucial to pick the development path that best fits your project's needs. The two main roads are the Expo Managed Workflow (often just called Expo Go) and the Bare Workflow (using the React Native CLI directly). They both get you to the finish line, but the journey is quite different.
Making the right choice here can save you a ton of headaches down the road. This table breaks down the key differences to help you decide.
| Factor | Expo Go (Managed Workflow) | Bare Workflow (React Native CLI) |
|---|---|---|
| Setup & Onboarding | Fastest way to start. Minimal setup, abstracts away native configs. Great for beginners and rapid prototyping. | More involved setup. You manage the native iOS (Xcode) and Android (Android Studio) projects yourself. |
| Native Code Access | Limited. You can't add custom native modules (Java/Kotlin, Obj-C/Swift) without "ejecting" to the Bare Workflow. | Full control. You have direct access to the native code, allowing for any custom integration or optimization. |
| Flexibility | Less flexible. You're dependent on the modules and APIs supported by the Expo SDK. | Maximum flexibility. If a native library exists, you can integrate it. You're not tied to any specific ecosystem. |
| Best For | MVPs, simple apps, projects without complex native dependencies, and teams wanting to focus purely on JavaScript/TypeScript. | Complex apps, projects requiring custom native modules, performance-critical features, and long-term, scalable products. |
Expo Go is fantastic for getting a proof-of-concept off the ground fast. But if you know you'll need deep native integrations—like a custom Bluetooth library or a specific payment SDK—starting with the Bare Workflow will give you the freedom you need from day one.
From a business standpoint, the argument is pretty clear. The biggest win is huge savings in time and money. Think about it: instead of paying for two separate native dev teams—one for iOS, one for Android—you can have one React Native team build a consistent, high-quality app for both. That doesn't just cut your initial budget; it makes ongoing maintenance and updates way simpler and cheaper.
This stack also slashes your time-to-market. You can spin up a Minimum Viable Product (MVP) with core mapping features in a fraction of the time. Need to show user locations, visualize delivery routes, or set up geofenced service areas? You can get it done fast.
Getting your app in front of users quickly means you can test your ideas and get real-world feedback sooner, which is a massive advantage in any competitive market.
The synergy here is incredible. Google Maps is practically everywhere, with 5 million active apps and websites using its core products every week. And when you look at the cross-platform world, React Native holds a solid 32% market share. Combine that with Google Maps' staggering 67% market share in navigation, and you're building on a foundation that is both massive and deeply trusted. You can dig into more of these stats over at onthemap.com.
By building on a platform that users already trust, you lower the barrier to adoption. People are more likely to engage with a mapping feature that looks and feels familiar, leading to better engagement and retention rates for your app.
At the end of the day, using React Native with Google Maps isn't just a technical decision. It's a smart business strategy that sets you up for scalability, a great user experience, and a much faster path to launching a successful app.
When you’re about to kick off a new React Native project with Google Maps, one of the first forks in the road you'll encounter is your development workflow. This isn't a small decision—it’s a choice between the managed Expo workflow and the Bare React Native workflow.
This isn't about which one is "better." It's about picking the right tool for the job. Your choice here will define how you build, configure, and ultimately ship your app, so making the right call early on can save you a world of headaches later.
Let’s break down what each path really means for you and your project.
Think of Expo as a helpful layer on top of React Native that smooths out the rough edges. It’s an open-source platform designed to get you up and running fast by handling most of the tricky native configuration behind the scenes. For many projects, this managed environment is a lifesaver.
If you're building something straightforward like a store locator or a simple map showing points of interest, Expo is probably your best bet. You can add react-native-maps and drop your Google Maps API key into a single config file (app.json or app.config.ts) without ever having to open Xcode or Android Studio. It’s a huge time-saver that lets you stay focused on writing JavaScript or TypeScript.
Why do developers love starting with Expo?
Of course, this simplicity comes with a trade-off. The managed workflow limits you to the native modules bundled within the Expo SDK. If your app needs a very specific native library—maybe for a unique Bluetooth device or a custom background task—you might hit a wall. For a deeper look at getting started, our complete Expo React Native tutorial is a great place to begin.
The Bare React Native workflow is for when you need to take the training wheels off. When you initialize a project with the React Native CLI, it generates standard native iOS (.xcworkspace) and Android (.gradle) projects. This gives you the keys to the kingdom—total control over every line of native code.
Imagine you're building a sophisticated delivery app that needs a highly optimized, battery-efficient background location service. That kind of custom work often requires a specialized native library not available in Expo. With the Bare workflow, you can integrate any third-party native module you want, or even roll up your sleeves and write your own custom Java, Kotlin, Objective-C, or Swift code.
The Bare workflow is the go-to choice when you need maximum flexibility and performance. It requires more initial setup and a deeper understanding of the native build systems, but it removes all limitations on what you can build.
Setting up react-native-maps in a Bare project is definitely more hands-on. You'll have to get comfortable with the native project files to:
AndroidManifest.xml on Android.AppDelegate.mm file for iOS.Info.plist (iOS) and the manifest (Android).It’s more work, no doubt. But that granular control is essential for serious, production-grade apps that can't afford to be boxed in. In the end, let your project's needs be your guide. Go with Expo for speed and simplicity; choose the Bare workflow when you need power and unrestricted access to the native side.
Alright, you've picked a path—Bare or Expo. Now it's time to roll up your sleeves and actually get a map rendering in your app. This is where the theory ends and the real work begins. We'll walk through the entire setup, from creating a fresh project to seeing that glorious map tile for the first time.
One of the biggest hurdles, even for seasoned devs, is wrestling with Google Maps API keys for iOS and Android. It's a common tripwire. We'll break down the specific native configurations you need for a Bare project and then show you the much simpler process for Expo. No matter your environment, you'll have a clear path forward.
Before a single pixel of a map can show up, you have to introduce your app to Google. This happens via API keys, which you’ll generate in the Google Cloud Console. Think of an API key as a unique password that gives your application access to Google's mapping services.
Getting the key is easy, but securing it is absolutely critical. You need to restrict your keys to prevent someone else from using them and running up your bill.
com.myawesomeapp).com.myawesomeapp) and its SHA-1 certificate fingerprint.My two cents: Always, and I mean always, create separate API keys for iOS and Android. A single, unrestricted key might seem fine for a quick test, but it's a massive security hole in production. Using separate keys lets you apply platform-specific restrictions and makes debugging a whole lot easier when things go wrong.
Don't forget to enable the "Maps SDK for Android" and "Maps SDK for iOS" for your keys inside the Google Cloud Console. If you miss this step, you'll be staring at a blank screen, which is a classic "why isn't this working?" moment.
This flowchart gives you a bird's-eye view of how the setup differs between Expo and the Bare workflow.
As you can see, Expo keeps everything neatly tucked into one configuration file. The Bare workflow, on the other hand, requires you to get your hands dirty with native platform files—the classic trade-off between simplicity and total control.
If you chose the Bare workflow, you're signing up for direct interaction with native project files. This gives you ultimate power but demands precision.
AndroidManifest.xml)For Android, your destination is android/app/src/main/AndroidManifest.xml. This is where you'll drop your API key, right inside the <application> tag.
<application ...>
Next up, you have to tell the system what permissions your app requires. Just before the <application> tag, add these lines to request location access.
AppDelegate.mm and Info.plist)Over on the iOS side, it's a two-file job. First, pop open ios/YourProjectName/AppDelegate.mm. You need to import the Google Maps library and then initialize it with your API key.
#import <GoogleMaps/GoogleMaps.h>
@implementation AppDelegate
Second, you have to add a usage description to ios/YourProjectName/Info.plist. This is the user-facing message that explains why you need their location. If you skip this, iOS will simply ignore your permission request.
This is where Expo really shines. It takes that multi-file native setup and boils it all down to one spot: your app.json (or app.config.ts). Expo's build service then does the heavy lifting of injecting these values into the correct native files for you.
Here’s what the configuration looks like in app.json:
{ "expo": { "plugins": [ [ "expo-location", { "locationWhenInUsePermission": "Show current location on map." } ] ], "android": { "permissions": [ "android.permission.ACCESS_COARSE_LOCATION", "android.permission.ACCESS_FINE_LOCATION" ], "config": { "googleMaps": { "apiKey": "YOUR_ANDROID_API_KEY_HERE" } } }, "ios": { "infoPlist": { "NSLocationWhenInUseUsageDescription": "Show current location on map." }, "config": { "googleMapsApiKey": "YOUR_IOS_API_KEY_HERE" } } } }
That one block handles everything for both platforms. It’s a perfect illustration of how Expo accelerates development, letting you stay out of the native weeds. If you're looking for pre-built projects that already have this set up, take a look at our collection of React Native Expo templates.
A map without the user's location is often just a pretty picture. But asking for that location data is a delicate dance. You have to build trust. A cardinal sin is demanding permission the second the app launches. The right way is to ask for it contextually—for example, when the user taps a "center on me" button.
For this, react-native-permissions is the industry standard. It gives you a clean, unified API for checking and requesting permissions on both iOS and Android.
Here’s a simple TypeScript function showing how to request access:
import { request, PERMISSIONS, RESULTS } from 'react-native-permissions'; import { Platform } from 'react-native';
const requestLocationPermission = async (): Promise
if (!permission) return false;
try { const result = await request(permission); return result === RESULTS.GRANTED; } catch (error) { console.error("Permission request failed", error); return false; } };
By structuring your logic this way, you create a much smoother user experience and only activate location-based features after getting the user's explicit consent. This respect for the user is fundamental to building quality, modern apps.
Okay, you've got a map rendering in your app. That's a huge first step, but a static map is really just a pretty background. The real magic happens when you start bringing it to life with dynamic, interactive data. This is where your app goes from just showing a map to actually using it.
We're going to cover the three essential building blocks for visualizing information: markers for specific points, polylines for drawing routes, and polygons for highlighting entire areas. All the examples here use modern React hooks like useState and useEffect, so you can be sure the code is clean and easy to maintain.
Let's start with the most common element you'll use: dropping pins on the map.

Markers are the classic pins you drop on a map to call out specific locations. They're perfect for showing anything from a list of coffee shops to user locations or delivery drop-off points. To do this, you'll lean heavily on the <Marker> component from react-native-maps.
Let's say you're fetching a list of business locations from an API. The standard approach is to store that data in your component's state, then loop over it to render a <Marker> for each one.
import MapView, { Marker } from 'react-native-maps'; import React, { useState, useEffect } from 'react';
// Define a simple type for our location data interface Location { id: string; name: string; latitude: number; longitude: number; }
const MyMapComponent = () => { const [locations, setLocations] = useState<Location[]>([]);
// Simulate fetching data from an API useEffect(() => { const fetchedData: Location[] = [ { id: '1', name: 'Coffee Shop A', latitude: 37.78825, longitude: -122.4324 }, { id: '2', name: 'Park B', latitude: 37.75825, longitude: -122.4624 }, { id: '3', name: 'Library C', latitude: 37.77825, longitude: -122.4124 }, ]; setLocations(fetchedData); }, []);
return (
<MapView style={{ flex: 1 }}>
{locations.map(location => (
<Marker
key={location.id}
coordinate={{ latitude: location.latitude, longitude: location.longitude }}
title={location.name}
description={Details for ${location.name}}
/>
))}
</MapView>
);
};
This snippet shows the core pattern: fetch data, save it to state, and map through it to render your UI. Each marker needs a unique key, a coordinate, and optional title and description props, which show up in a default pop-up when the user taps the pin.
The default red pin is fine, but it probably doesn't match your app's design. Thankfully, customization is straightforward. You can either swap the pin with an image or use a custom React component for total control.
image prop.
<Marker image={require('./assets/custom-pin.png')} /><Marker>.
<Marker><MyCustomIconComponent /></Marker>The default pop-up (the callout) is also pretty basic. For a richer experience, you can create a completely custom one using the <Callout> component. This lets you put any views, text, or even buttons inside the info window.
While markers are for points, polylines are for connecting them. They're exactly what you need for showing a delivery route, a hiking trail, or driving directions. The <Polyline> component just needs an array of coordinates, and it will draw a line connecting them in order.
Imagine you need to map out a planned delivery route. You'd just feed the sequence of GPS coordinates to the coordinates prop.
import { Polyline } from 'react-native-maps';
const deliveryRoute = [ { latitude: 37.78825, longitude: -122.4324 }, // Start { latitude: 37.75825, longitude: -122.4624 }, // Waypoint 1 { latitude: 37.77825, longitude: -122.4124 }, // Destination ];
<MapView style={{ flex: 1 }}>
<Polyline
coordinates={deliveryRoute}
strokeColor="#000" // fallback for when strokeColors is not supported
strokeColors={[
'#7F0000',
'#00000000', // no color, creates a "dashed" line
'#B24112',
'#E5845C',
]}
strokeWidth={6}
/>
</MapView>
You can easily tweak the line's look with props like strokeColor and strokeWidth. It’s a simple but incredibly powerful way to add context to your map data.
Finally, when you need to highlight an entire area instead of just a point or a line, polygons are your tool. A <Polygon> creates a closed shape on the map, making it perfect for visualizing things like park boundaries, service districts, or geofenced zones.
Like a polyline, it takes an array of coordinates, but the library automatically closes the shape by connecting the last point back to the first.
One common pitfall with polygons is performance. Rendering a complex polygon with thousands of coordinates can really bog down the map's UI thread. If you're dealing with high-density shapes, try to simplify the coordinate data before passing it to the component.
Here’s how you could outline a service area for a local business:
import { Polygon } from 'react-native-maps';
const serviceArea = [ { latitude: 37.8025259, longitude: -122.4351431 }, { latitude: 37.7896386, longitude: -122.421646 }, { latitude: 37.7665248, longitude: -122.4161628 }, { latitude: 37.7838188, longitude: -122.4422135 }, ];
<MapView style={{ flex: 1 }}> <Polygon coordinates={serviceArea} strokeColor="rgba(0, 0, 0, 0.5)" fillColor="rgba(255, 0, 0, 0.2)" strokeWidth={2} /> </MapView>
The fillColor prop is what gives the shape its shaded interior. By combining markers, polylines, and polygons, you have a complete toolkit to represent almost any kind of location-based data you can dream up for your React Native app.
Getting a simple map with a few pins on the screen is one thing, but making it feel polished and professional is where the real work begins. To build a truly great mapping feature, you have to move past the basics and tackle the real-world challenges that crop up in production—things like performance bottlenecks and a generic UI. It all comes down to handling large datasets smartly and tailoring the map’s look to fit your brand.
If you’re trying to display hundreds or even thousands of locations at once, rendering a unique marker for each will bring your app’s UI to a screeching halt. The answer here is marker clustering. Instead of flooding the map with a sea of overlapping pins, clustering groups nearby markers into a single, numbered icon. As a user zooms in, these clusters cleverly break apart to reveal the individual markers hiding within.
This is a non-negotiable for any app with dense data, whether it’s a real estate app showing every listing in a city or a social platform mapping out user check-ins. The good news is that implementing this with react-native-maps is surprisingly straightforward.
Performance isn't just a nice-to-have; it's the foundation of a good user experience. A laggy, stuttering map is frustrating and can easily convince someone to close your app for good. The two most common performance killers I see are unnecessary re-renders of the map view itself and its child components, like markers.
Thankfully, you can fight back with a couple of core React optimization hooks:
React.memo: Wrap your custom marker components with React.memo. This is a huge win, as it stops them from re-rendering unless their props have actually changed. When you’ve got a ton of markers on screen, the performance gain is massive.useCallback: For any functions you pass as props to your map components—like an onPress handler for a marker—wrap them in the useCallback hook. This ensures the function’s reference doesn’t change on every render, which in turn prevents needless re-renders of child components that depend on it.My go-to tip here is to start profiling your map screen early and often using Flipper. It gives you a clear visual of which components are re-rendering too frequently. Catching these problems before they pile up will save you countless hours of debugging down the line.
The default Google Maps style gets the job done, but let’s be honest, it probably doesn’t match your app's branding. A custom-styled map not only looks more professional but can seriously improve usability by toning down irrelevant details (like highways or parks) and highlighting what actually matters to your users.
You don't have to be a designer to pull this off. Services like Snazzy Maps offer thousands of free, pre-designed map styles created by the community. You can find everything from slick dark mode themes to minimalist, retro, or even artistic looks.
The process couldn't be simpler:
customMapStyle prop of your <MapView> component.This one small change can dramatically elevate your app's entire look and feel. It makes the map feel like an integral part of your application instead of just a generic widget you dropped in.
Finally, any production-grade map usually needs its own set of UI controls overlaid on top. Think about a custom search bar, a set of filter buttons, or a simple "re-center" icon. Placing these elements outside the map view often feels clunky and disconnected. The best approach is to position them absolutely, right on top of the <MapView>.
By wrapping your <MapView> and your UI controls in a container View, you can use absolute positioning to place elements exactly where you need them. This technique is also perfect for creating custom callouts that pop up when a marker is tapped, offering a much richer and more interactive experience than the default info window. If you're building out more complex flows, knowing how to handle navigation with things like deep linking in React Native can really level-up the user journey from the map to other parts of your app.
Google Maps commands an incredible 67% of the global market share in mobile navigation, so its dominance is undeniable. This widespread familiarity means users come in with high expectations. You can find a deeper dive into these numbers in this breakdown of Google Maps statistics on sqmagazine.co.uk. Using these advanced techniques is what will help you meet—and hopefully exceed—those expectations.
When you're deep in the weeds of a React Native Google Maps integration, a few tricky, platform-specific issues always seem to crop up. Let's walk through some of the most common ones I've seen and get you back on track.
This is a classic. If you see your map perfectly on an iPhone but get a blank white screen on Android, it's almost a guarantee that something is off with your Android API key setup.
First, a quick sanity check: did you remember to enable the Maps SDK for Android in your Google Cloud Console? It's a separate toggle from the iOS one, and it’s surprisingly easy to miss.
Next, open up your AndroidManifest.xml and make sure the API key is exactly right—no stray spaces or typos. But the real culprit, nine times out of ten, is a mismatch with your SHA-1 fingerprint. The SHA-1 in your Google Cloud Console credential settings must match the one you're using to sign your app. If your debug SHA-1 is registered but you're testing a release build (or vice versa), you'll get a blank map every time.
The default <Callout> component just doesn't cut it for a polished app. It's especially frustrating on Android, where custom views inside it aren't even interactive. The best approach? Ditch the default and build your own.
The trick is to create a completely custom component and position it outside the <MapView>, using absolute positioning. You'll use your component's state to control its visibility and what data it shows.
When a user taps a <Marker>, you update the state with that marker's details and maybe its screen coordinates. This hands you complete creative freedom. You can now build a fully interactive callout with buttons, images, scrollable text—whatever your design calls for. It's the only way to deliver that truly professional feel.
By decoupling your callout from the default
<Callout>component, you gain total control over its appearance and interactivity. This is the secret to building a polished, professional-grade map feature.
Trying to render thousands of individual markers at once is a recipe for disaster. Your app will crawl to a halt, and your map will be an unreadable mess of overlapping pins. The proven, industry-standard solution here is marker clustering.
Instead of plotting every single point, you show a single cluster icon that represents a group of nearby markers. As the user zooms in, the clusters intelligently break apart into smaller groups or individual markers.
The good news is that react-native-maps has fantastic built-in support for this. By enabling clustering on your <MapView> and wrapping your <Marker> components correctly, the library does all the heavy lifting for you. This one technique can dramatically boost performance and make even the most data-heavy maps feel incredibly snappy.
Ready to build your app without starting from scratch? theappmarket offers a massive catalog of production-ready, fully customizable React Native templates. Check out our collection and launch your next project faster at https://theappmarket.io.

Dec 08, 2025
4 min read
android login with facebook: Learn to set up the Facebook SDK, manage tokens, and implement secure authentication across native Android, cross-platform apps.

Dec 07, 2025
4 min read
Master the alert in React Native. Learn to handle platform differences, build custom modals, and apply best practices for a seamless user experience.

Dec 06, 2025
4 min read
keyboardavoidingview react native: Master keyboard handling with KeyboardAvoidingView across iOS, Android, Expo, and TypeScript.

Dec 05, 2025
4 min read
A practical guide to implementing a React Native PDF viewer. Learn to compare libraries, handle native setup, and troubleshoot common issues with real code.

Dec 04, 2025
4 min read
how to validate startup idea: learn proven methods like customer interviews, MVPs, and metrics to confirm market fit.

Dec 03, 2025
4 min read
how to make app like uber: Learn core features, tech stack, development steps, testing, and launch tips.

Dec 02, 2025
4 min read
Build a rock-solid React Native setup. This guide covers Expo vs. Bare workflows, TypeScript, pnpm monorepos, NativeWind, and deployment strategies.

Dec 01, 2025
4 min read
A practical guide to Stripe React Native integration. Learn to set up your server, build payment UIs, handle webhooks, and launch secure mobile payments.

Nov 30, 2025
4 min read
Learn how to master push notifications in React Native. This guide covers setup, best practices, and advanced techniques for engaging your users.

Nov 28, 2025
4 min read
Explore deep linking react native with a practical guide to configuring URL schemes, universal links, navigation, and testing for Expo and bare apps.

Nov 28, 2025
4 min read
A practical guide to building a scalable React Native design system. Learn to implement tokens, theming, and tools like NativeWind and gluestack-ui.

Nov 26, 2025
4 min read
Learn why react native expo templates speed up your projects with ready-made patterns and practical tips.

Nov 25, 2025
4 min read
Discover how to improve developer productivity with actionable strategies for workflow, tooling, and culture. A practical guide for software engineering teams.

Nov 24, 2025
4 min read
Discover the best cross platform app development tools. Compare top frameworks like Flutter and React Native to build and ship apps faster.

Nov 23, 2025
4 min read
This Expo React Native tutorial provides a hands-on guide to building cross-platform apps. Learn setup, styling with NativeWind, navigation, and deployment.

Nov 22, 2025
4 min read
Build beautiful UIs faster with this guide to Tailwind CSS React Native. Learn setup, styling, and advanced techniques with NativeWind for mobile apps.

Nov 21, 2025
4 min read
Explore our curated list of 7 top-tier React Native app examples. Discover production-ready templates and resources to build your next app faster.

Mar 19, 2025
4 min read
theappmarket offers React Native UI templates to accelerate development. Get customizable, production-ready React Native app templates and Ui kit, some free. Build faster & smarter today!