Rapid Friday Sale is Live!
Get exclusive discounts on all products
Dec 11, 2025

4 min read

So, what exactly is a React Native UI kit? Think of it as a professional-grade LEGO set for your app's interface. It’s a library packed with pre-built, beautifully designed components—buttons, inputs, navigation bars, you name it—all ready to be dropped right into your project.
Imagine you’re building a house. You could spend months chopping down trees, milling the lumber, forging every single nail, and hand-carving each doorknob. Or, you could start with high-quality, pre-fabricated materials designed to fit together seamlessly. A React Native UI kit is that second option, but for app development.
Instead of coding every single button, slider, and pop-up modal from scratch, a UI kit gives you a treasure trove of ready-to-use components. These aren't just styled rectangles; they're fully engineered pieces of code that already handle user interactions, accessibility standards, and the subtle differences between iOS and Android. This frees you up to focus on what makes your app unique, not on reinventing the wheel.
Grabbing a UI kit isn't just a lazy shortcut—it’s a smart, strategic move that has a huge impact on your project's timeline, budget, and final quality. The global market for React Native development was valued at around USD 325 million in 2024 and is only getting bigger. Using a UI kit is how you tap into that growth efficiently.
The benefits become obvious almost immediately:
A UI kit creates a shared language between designers and developers. This simple alignment cuts down on miscommunication and ensures the app you build actually looks like the app you designed. The whole process just becomes smoother and far more predictable.
At the end of the day, a well-chosen React Native UI kit is your ticket to shipping a polished, feature-rich app in a fraction of the time. It’s an investment in speed and quality that pays off again and again. To see what these powerful toolkits look like in action, you can explore our one-stop hub for React Native UI templates.
Picking the right React Native UI kit feels a lot like choosing the engine for your car. It’s a decision that’s going to dictate performance, speed, and how much of a headache it is to work with down the road. The ecosystem is packed with great options, but they’re all built on different philosophies. Getting a handle on those differences is the key to picking a kit that actually helps you reach your project’s goals.
Some kits are all-in on a specific design system, giving you a polished, consistent look right out of the box. Others are more like a blank canvas, offering a neutral starting point for a totally unique brand identity. You’re often trading off-the-shelf beauty for ultimate creative freedom. Do you need something that strictly follows Material Design, or are you building a brand from the ground up?
This diagram really nails the core benefits you get from any quality UI kit, no matter which path you take.
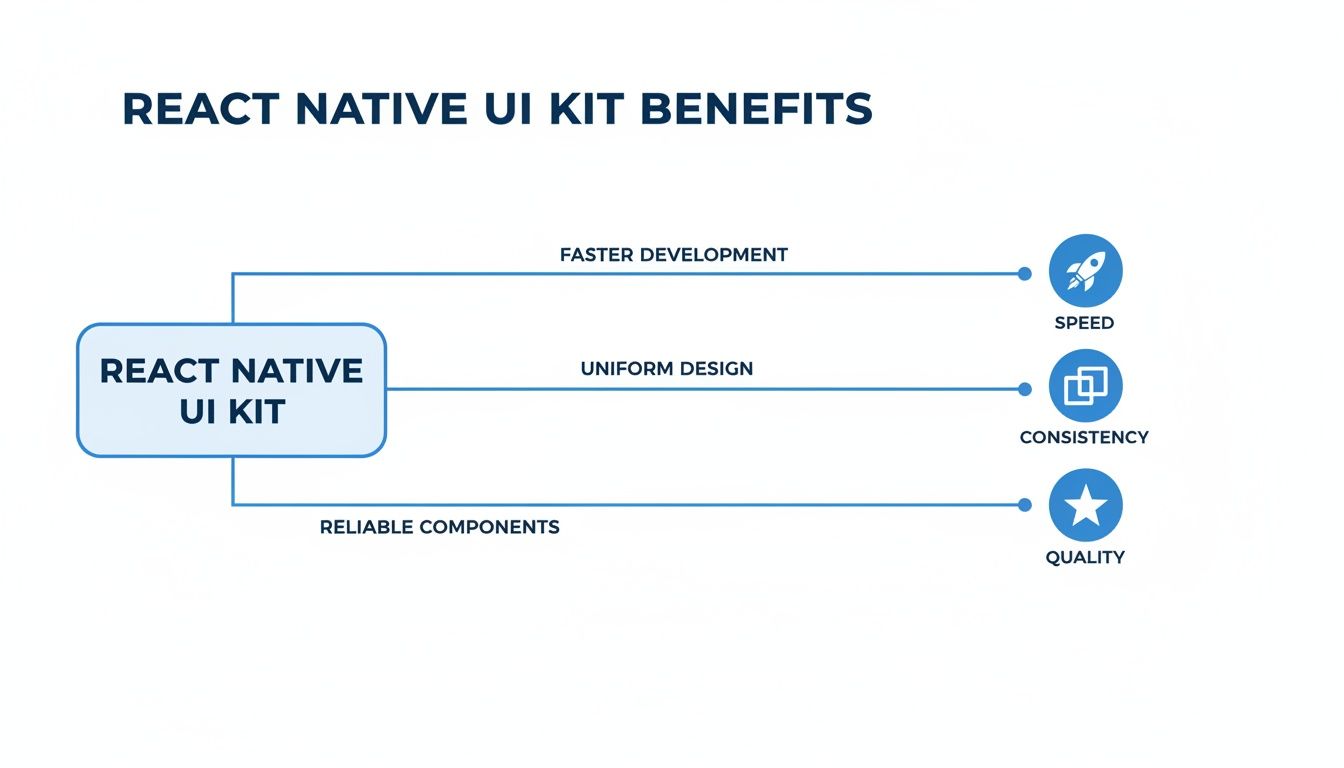
At the end of the day, those three pillars—speed, consistency, and quality—are exactly why we turn to a React Native UI kit in the first place.
When developers start hunting for a UI kit, a few names always bubble to the surface. These libraries have earned their stripes through killer documentation, massive community support, and a long history of being battle-tested in real-world production apps.
For instance, React Native Elements has been a long-time favorite. It gives you a fantastic set of plug-and-play components that you can customize to your heart's content, which is perfect for getting up and running fast. Then you have libraries like React Native UI Kitten, which is built around the Eva Design System. It comes with powerful features like light and dark modes and right-to-left language support baked right in, which is a lifesaver for apps aiming for a global audience. You can find some great deep dives into these libraries to see how they stack up.
Each of these represents a different way of thinking. React Native Elements is famously unopinionated. It’s not trying to force a rigid design style on you, making it an awesome choice for rapid prototyping or for teams that want total control over the final look and feel.
The best kit isn’t the one with the most components, but the one whose philosophy best matches your team's workflow and your product's design vision. A mismatched kit can create more friction than it solves.
UI Kitten, on the other hand, is built around its own design system. That structure can be a massive advantage for teams needing to keep a tight, cohesive visual identity across multiple apps. Its theming system is a beast, letting you define your brand's style once at a high level and watch it cascade through every single component.
To help cut through the noise, this table breaks down a few of the most popular UI kits by the features that matter most when you're making a decision. It’s a quick-and-dirty guide to see how their core philosophies translate into practical, day-to-day development.
| UI Kit | Core Philosophy | Customization Level | Best For | Theming Support |
|---|---|---|---|---|
| React Native Elements | Community-driven, unopinionated, and easy to use. | High | Rapid prototyping, projects needing a unique look, beginners. | Basic |
| React Native Paper | Follows Google's Material Design guidelines strictly. | Medium | Apps that need a native Android look and feel, enterprise applications. | Excellent |
| UI Kitten | Based on the Eva Design System for brand consistency. | High | Teams needing strong brand cohesion, apps with light/dark modes. | Excellent |
| NativeBase | Utility-first, highly accessible, and platform-agnostic. | Very High | Developers who love utility classes (like Tailwind CSS), design systems. | Excellent |
Ultimately, the best choice here is the one that feels like a natural extension of your team's skills and your app's DNA.
Your decision should really boil down to a few practical questions you need to ask yourself.
Before you even think about running npm install, let’s walk through a developer-focused checklist. Think of it like doing due diligence on a critical piece of your tech stack. A flashy demo page is nice, but it's the health and flexibility of the project that will make or break your experience. Asking the right questions now will save you a world of pain later.
First things first: check the docs. Is the documentation clear, comprehensive, and packed with real-world examples? If you can’t figure out how to customize a simple button in under five minutes, that’s a massive red flag. Good documentation is a dead giveaway of a well-maintained and thoughtful library.
Next, you need to play detective. Head straight over to the project's GitHub repository. This is where you find the real story.
Every single dependency you add to your project increases your app's final bundle size and can mess with its performance. Any top-tier React Native UI kit should be built with efficiency in mind.
You need to find out if the kit supports tree-shaking. This is a crucial feature that makes sure only the components you actually use end up in your final build. Without it, you could be forcing your users to download an entire component library just because you used a single button. That's a surefire way to slow down your app's startup time and make it feel sluggish.
Your goal is a lean, performant application. A UI kit should help you achieve that, not hinder it. Always prioritize libraries that are transparent about their performance footprint and offer tools to minimize it.
Let's be real: a UI kit should serve your brand, not the other way around. How easy is it to change things? Can you override default styles for colors, fonts, and spacing without resorting to ugly hacks and !important everywhere? A powerful theming API lets you define your design system once and have it ripple through every single component.
Look for a kit with a centralized theme provider or a utility-first approach. The ability to easily extend components or create new variants is just as important. If you find yourself constantly fighting the library's built-in styles, it’s the wrong tool for the job.
The best React Native UI kit gives you a solid foundation you can effortlessly build on to create a totally unique and polished experience for your users.
So you've picked the perfect React Native UI kit. Now the real fun begins. Getting a kit into your project is more than just installing a package—it’s about weaving it into the fabric of your codebase so it feels like a natural extension of your app.
This is the ground floor for building a scalable, maintainable, and uniquely branded user experience.
The journey kicks off in your terminal. Most UI kits use a standard installation with npm or yarn. It’s usually a simple command, but read the docs carefully. You need to watch out for peer dependencies, like vector icons or gesture handlers. Missing one of those is a classic recipe for a random, hard-to-debug crash.
Once it's installed, the single most important step is to wrap your entire application in the kit’s theme provider. Think of this provider as the central nervous system for your app's styling. It’s what injects all your design tokens—colors, fonts, spacing—into every component, making sure everything looks consistent.
A huge mistake I see developers make is jumping straight into overriding component styles with inline objects or messy stylesheets. Don't do it. That path leads to a maintenance nightmare.
Instead, the right way to do this is to create a dedicated theme file. This is where you'll define your brand’s entire visual identity. It becomes the single source of truth for your app's look and feel.
This centralized theme object is where you map your brand’s design system to the UI kit's structure.
When you manage these values in one place, you can roll out global style changes in seconds. A one-line change in your theme file can update every button, card, and input across your entire app. This keeps your brand consistent without having to refactor dozens of files. This is a core idea you can dig into deeper when building a complete React Native design system.
The goal is to work with the UI kit's intended customization APIs, not fight against them. A well-structured theme makes your app dramatically easier to update and scale, saving your codebase from becoming a tangled mess of one-off style overrides.
Let's be real: no React Native UI kit will have every single component variant you need right out of the box. That’s okay. The best kits are built to be extended. Instead of ejecting and rewriting a component from the library, you should create custom wrappers around the kit’s components to add new functionality or create specific variants.
For instance, maybe you need a PrimaryButton, a SecondaryButton, and a DestructiveButton. You can build these as new components that simply import the base Button from the UI kit and apply pre-configured props and styles directly from your theme.
This approach pays off in a few huge ways:
This method keeps your code clean, follows the DRY (Don't Repeat Yourself) principle, and ensures your app’s unique look can evolve without breaking everything.

You don’t have to look far to see the power of a component-driven approach. It’s validated every single day by some of the biggest apps on the planet. While giants like Instagram and Shopify have the resources to build their own proprietary component libraries, their entire development philosophy is built on the same principles as a good React Native UI kit.
They build with standardized, reusable pieces to achieve massive scale, incredible speed, and pixel-perfect consistency. Their success is all the proof you need that this method just plain works. Whether you grab an open-source kit or build an internal design system, thinking in components is non-negotiable for any serious app.
This approach is backed by massive adoption. React is used by more than 11 million websites across the globe, holding a 45.8% share of the JavaScript library market. It's no accident that companies like Walmart and Airbnb bet on React Native. They know its component architecture can handle the pressure of millions of users and complex interfaces, proving it's more than ready for the big leagues. You can discover more about React Native's market impact to see why it's such a trusted choice.
If there's one lesson to take away from these tech titans, it's this: a shared component library is your secret weapon for efficiency. It becomes the single source of truth that gets designers and developers on the same page, cutting down on those frustrating inconsistencies that slow everything down.
Just think about the benefits these companies get, which are the same ones your team gets by using a React Native UI kit:
Using a structured UI system isn't just about making things look good. It's an operational strategy that enables teams to build better products faster and with fewer resources. It’s the difference between organized construction and chaotic assembly.
By choosing a quality UI kit, you're essentially adopting the same best practices that help industry leaders dominate their markets. You get a scalable, organized, and efficient workflow right out of the box. To see how this plays out in the real world, check out some of these impressive React Native app examples built with these principles.
Choosing a React Native UI kit is a big step. When you commit to a library, you're investing serious time and resources, so it's smart to get your questions out of the way before you write a single line of code. Let's walk through the most common concerns developers have and get you the clear answers you need to move forward with confidence.
This is probably the number one fear developers have, and for good reason. No one wants to build a cookie-cutter app.
The short answer? Not if you use it right. A high-quality UI kit isn’t a rigid template; it’s a flexible foundation built for customization.
Think of it like a professional artist's toolkit. It gives you the best brushes and paints (the components), but you're still the one creating the masterpiece. Powerful theming APIs let you define your brand’s unique color palette, typography, and component styles. By taking the time to build out a custom theme, you can get a look that is entirely your own while still cashing in on the speed and consistency the kit provides.
It’s true that every dependency you add to your project adds to the final bundle size, which can impact performance. But modern UI kits are built with this in mind—they're not just style collections, they're highly optimized pieces of software.
The magic word to look for here is tree-shaking. This process makes sure that only the components you actually import are included in your app's final build. For example, if you only use a Button and an Input, all the code for sliders, cards, and modals gets left on the cutting room floor. A well-built React Native UI kit shouldn't slow your app down in any noticeable way, but it's always a good practice to profile your app to spot any potential bottlenecks.
A UI kit should be an accelerator, not an anchor. Stick with libraries that are open about their performance footprint and use modern optimizations like tree-shaking to keep your app lean and fast.
Technically, yes, you can install and use components from multiple UI kits in the same project. But you really, really shouldn't. It almost always creates more problems than it solves.
Trying to juggle multiple kits introduces some major headaches:
The best path is to pick one primary UI kit and make it your single source of truth. If you run into a situation where you need a component the kit doesn't offer, the right move is to build it yourself, following the design system you've already established.
This is a real risk with any open-source project. The last thing you want is to build your entire app on a library that stops getting updates, leaving you high and dry with bugs and compatibility issues down the road.
Luckily, you can seriously lower this risk by doing a little homework upfront. Before you commit, head over to the kit's GitHub repo and check its vital signs. Look for key indicators: how frequent are recent commits? Are the maintainers actively responding to issues? How big and active is the community? A popular React Native UI kit with thousands of stars and a buzzing community is always a much safer bet.
Ready to skip the headaches and start with a foundation that’s built to last? theappmarket offers a curated collection of premium React Native templates and UI kits designed for speed and quality. Find the perfect starter for your next app today.

Dec 14, 2025
4 min read
Find the perfect React Native UI library for your project. This guide compares top libraries, selection criteria, and customization strategies.
Dec 13, 2025
4 min read
Learn how to change app name in React Native and Expo. Our guide covers display names, bundle IDs, and store listings for iOS and Android projects.

Dec 12, 2025
4 min read
Discover the best React Native component library for your next project. We compare top libraries on performance, customization, and real-world use cases.

Dec 10, 2025
4 min read
Explore our in-depth guide to find the best React Native UI library. We compare top contenders to help you choose the right fit for your project.

Dec 09, 2025
4 min read
Discover a practical approach to building apps with React Native. This guide covers setup, UI, state management, and testing to help you ship great apps.

Dec 08, 2025
4 min read
android login with facebook: Learn to set up the Facebook SDK, manage tokens, and implement secure authentication across native Android, cross-platform apps.

Dec 07, 2025
4 min read
Master the alert in React Native. Learn to handle platform differences, build custom modals, and apply best practices for a seamless user experience.
Dec 06, 2025
4 min read
keyboardavoidingview react native: Master keyboard handling with KeyboardAvoidingView across iOS, Android, Expo, and TypeScript.

Dec 05, 2025
4 min read
A practical guide to implementing a React Native PDF viewer. Learn to compare libraries, handle native setup, and troubleshoot common issues with real code.

Dec 04, 2025
4 min read
how to validate startup idea: learn proven methods like customer interviews, MVPs, and metrics to confirm market fit.

Dec 03, 2025
4 min read
how to make app like uber: Learn core features, tech stack, development steps, testing, and launch tips.

Dec 02, 2025
4 min read
Build a rock-solid React Native setup. This guide covers Expo vs. Bare workflows, TypeScript, pnpm monorepos, NativeWind, and deployment strategies.

Dec 01, 2025
4 min read
A practical guide to Stripe React Native integration. Learn to set up your server, build payment UIs, handle webhooks, and launch secure mobile payments.

Nov 30, 2025
4 min read
Learn how to master push notifications in React Native. This guide covers setup, best practices, and advanced techniques for engaging your users.

Nov 29, 2025
4 min read
Build powerful location-based apps with our practical guide to react native with google maps. Get setup guides, pro tips, and best practices for iOS & Android.

Nov 28, 2025
4 min read
Explore deep linking react native with a practical guide to configuring URL schemes, universal links, navigation, and testing for Expo and bare apps.

Nov 28, 2025
4 min read
A practical guide to building a scalable React Native design system. Learn to implement tokens, theming, and tools like NativeWind and gluestack-ui.

Nov 26, 2025
4 min read
Learn why react native expo templates speed up your projects with ready-made patterns and practical tips.

Nov 25, 2025
4 min read
Discover how to improve developer productivity with actionable strategies for workflow, tooling, and culture. A practical guide for software engineering teams.

Nov 24, 2025
4 min read
Discover the best cross platform app development tools. Compare top frameworks like Flutter and React Native to build and ship apps faster.
Nov 23, 2025
4 min read
This Expo React Native tutorial provides a hands-on guide to building cross-platform apps. Learn setup, styling with NativeWind, navigation, and deployment.

Nov 22, 2025
4 min read
Build beautiful UIs faster with this guide to Tailwind CSS React Native. Learn setup, styling, and advanced techniques with NativeWind for mobile apps.

Nov 21, 2025
4 min read
Explore our curated list of 7 top-tier React Native app examples. Discover production-ready templates and resources to build your next app faster.
Mar 19, 2025
4 min read
theappmarket offers React Native UI templates to accelerate development. Get customizable, production-ready React Native app templates and Ui kit, some free. Build faster & smarter today!